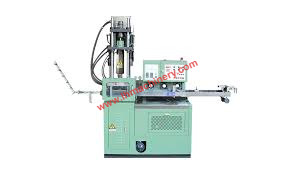
A garment factory supervisor holds up a finished jacket, examining the zipper that extends two centimeters past the hem, a small error that ruins the entire piece. The production line cannot use that zipper without modification, yet cutting it seems straightforward until the worker considers the delicate stop mechanism and the interlocking teeth that must remain intact. This scenario plays out daily in sewing rooms, where operators face the task of shortening a resin zipper without creating a new set of problems. The procedure appears simple, but the consequences of a mistake include a useless zipper, wasted material, and delayed orders. What does an operator need to know about handling a resin zipper machine's output to achieve a perfect, functional short length, and how does lhmachinery support that process through reliable equipment design?
The first principle of shortening a resin zipper involves measuring twice before any cut occurs, because a single extra millimeter cannot be restored. Operators must identify the final required length from the top stop to the bottom stop, marking this measurement clearly with a fabric pencil or tape that does not leave residue. The cut position should fall at least one full tooth above the desired final length, because the new bottom stop will occupy that space and must grip the tooth securely. Many inexperienced workers mark the exact final length as their cut point, only to find that the stop cannot be applied correctly, leaving a gap or a weak attachment that fails under tension. Proper planning saves time and materials, and it begins with understanding the anatomy of the resin zipper, where each tooth has a specific orientation and the tape must remain undamaged for the new stop to hold.
The cutting tool choices determine whether the zipper tape frays or stays clean. Standard scissors often compress the tape and shift the teeth, creating an uneven edge that makes stop application difficult. A hot knife or a thermal cutter melts the tape fibers as it cuts, sealing the edge and preventing unraveling that would compromise the new bottom stop. Some operators use a small craft knife with a fresh blade, scoring the tape between teeth and then snapping it cleanly, though this method requires a steady hand and practice to avoid nicking adjacent teeth. The factory should provide designated cutting stations with proper tools, because improvised solutions introduce variability that reduces quality control. The investment in correct tools pays off through reduced rework and consistent outcomes across hundreds of shortened zippers.
After the cut, the new bottom stop must be installed to replace the one removed. The original stop gets discarded along with the excess tape, and the operator must select a stop size that matches the zipper gauge. Metal stops, often made of brass or aluminum, clamp onto the tape using a pair of pliers with a stop-setting notch that crimps the stop without crushing the zipper teeth. Resin stops, which match the zipper material, require a specialized heating tool that melts the stop material onto the tape, fusing it to the teeth and tape fibers for a durable bond. This step demands attention because a loose stop separates during use, allowing the slider to detach and rendering the zipper useless. Operators should test every new stop by tugging it firmly before sending the zipper into production, catching failures before they reach the customer.
The slider must remain on the zipper throughout the shortening process, because removing it and reattaching it risks spreading the teeth or damaging the slider box. Operators work with the slider positioned near the new bottom stop, using a flat tool to spread the slider slightly if it becomes stuck, but never forcing it past the new stop. After the bottom stop is secured, the operator runs the slider up and down the shortened zipper several times, checking for smooth movement and ensuring that the stop engages properly. Any roughness or catching indicates a problem with the stop installation or a damaged tooth, and that zipper should be set aside for inspection. This quality check takes only seconds but prevents defective zippers from entering the finished product.
The tape edge condition after cutting and stopping affects how the zipper sits in the garment. A clean, sealed edge lies flat against the fabric, while a frayed edge creates a bumpy appearance that shows through lightweight materials. Operators sometimes apply a thin layer of clear adhesive or a heat-sealing tape to the cut edge if the thermal cutter did not fully melt the fibers, providing an extra barrier against unraveling. The final assembly requires the shortened zipper to be sewn into the garment with the top and bottom stops correctly positioned, because the sewing line must not pierce the stop or the adjacent teeth. This integration with the garment construction highlights the importance of accurate shortening, because errors at this stage compromise the entire product's appearance and durability.
Some facilities employ automated shortening stations that combine measurement, cutting, and stop application in one operation, reducing human error and increasing consistency. These machines use sensors to detect the precise tooth position, cut the tape with a heated blade, and apply a new stop in a single cycle. For large-volume operations, such automation proves cost-effective, while smaller workshops rely on skilled operators who follow a strict protocol. The choice between manual and automated processes depends on the production volume and the budget available, but the fundamental principles of careful measurement, clean cutting, and secure stopping remain unchanged.
In certain cases, the zipper requires shortening from the top end rather than the bottom, especially when the manufacturer wants to reuse a specific bottom stop design. This procedure involves removing the top stop, cutting the tape, and installing a new top stop that matches the original. The slider must be removed for this operation, requiring a tool to open the slider box and reattach it after the new top stop is in place. This method is less common and more complex, but it becomes necessary when the zipper has a custom bottom stop that cannot be replicated easily. Operators performing this type of shortening receive additional training, because the slider removal and reattachment steps introduce more opportunities for damage.
Every zipper shortening process ultimately depends on the quality of the original zipper tape and teeth, because a poorly made zipper fails regardless of how expertly it gets shortened. Manufacturers who invest in high-quality production equipment produce zipper tapes with consistent thickness and tooth spacing, making shortening predictable and reliable. The technical specifications and application notes provided through https://www.lhmachinery.com/product/ offer a practical reference for understanding how proper equipment design contributes to the overall durability and workability of resin zippers, ensuring that every shortening operation begins with a solid foundation that minimizes the risk of damage and waste.


 Search in Classifieds
 Search in Groups
 Search in Polls
 Search in Members
 Search in Members
 Search in News
 Search in Businesses
 Search in Contests
 Search in Events
 Search in Music Albums
 Search in Music Songs
 Search in Quotes
 Search in Site Team



Share this page with your family and friends.