Search in Classifieds
Search in Groups
Search in Polls
Search in Members
Search in Members
Search in News
Search in Polls
Search in Businesses
Search in Contests
Search in Events
Search in Music Albums
Search in Music Songs
Search in Quotes
Search in Site Team
Search in Jobs
Search in Products
Search in Products
Posted by - CrystalNova -
on - Jun 12 -
Filed in - Sports -
-
742 Views - 0 Comments - 0 Likes - 0 Reviews
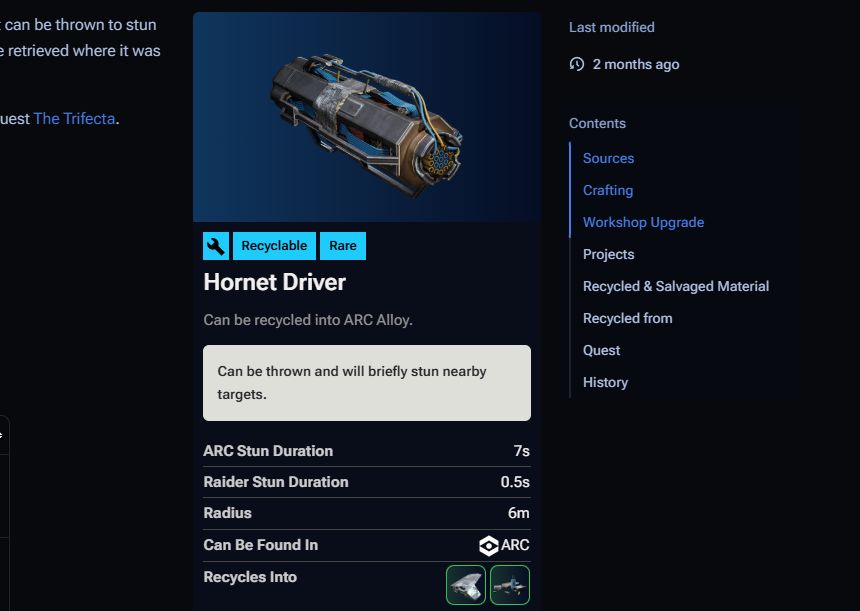
In ARC Raiders, few encounters feel as chaotic as dealing with airborne enemies. Among them, the Rocketeer stands out as one of the most dangerous targets in the game, while the Hornet Driver has quietly become one of the most important utility tools for controlling it. When used correctly, this combination turns a high-risk fight into a controlled farm loop instead of a panic scramble.
The idea is simple on paper: disable the Rocketeer mid-air, force a crash, and capitalize on its recovery window. In practice, timing and spacing matter more than raw damage.
The Hornet Driver is essentially a disruption tool. It releases an EMP-style burst that interferes with nearby mechanical systems, and the Rocketeer—being a heavily armored flying unit—is extremely vulnerable during its hover and thrust cycles.
The most consistent community-tested setup looks like this:
The key is not damage—it’s control. If the EMP hits while the Rocketeer is adjusting thrust or turning mid-air, the destabilization effect compounds, often forcing a hard crash landing.
A practical example: players farming in mid-tier zones reported that out of 10 Rocketeer encounters, about 7–8 can be forced into a grounded state using proper Hornet timing, while only 2–3 require full combat engagement in the air.
To reliably take down a Rocketeer using a Hornet Driver, the sequence matters more than raw reaction speed:
When executed correctly, the Rocketeer will destabilize, flip, and crash. The real value is what happens next: it enters a short recovery state where its armor plating is exposed, reducing effective damage resistance by an estimated 20–40% depending on angle and weapon type.
At that point, even mid-tier rifles can delete its exposed core in under 10 seconds of sustained fire.
This strategy is popular because it changes the fight economy. Instead of spending 30–60 seconds dodging missiles and tracking aerial movement, players compress the encounter into two phases:
That means a full kill cycle can average around 15 seconds in optimal conditions, compared to 40+ seconds in a full aerial duel.
Over multiple runs, this difference adds up. For example:
That’s roughly a 50–60% efficiency gain, not counting reduced ammo waste and lower risk of downed states.
Mid-game players often start using this combo once they unlock reliable EMP utility and enough mobility to maintain spacing. The Rocketeer itself is also valuable because it drops rare crafting components used in high-tier weapon progression loops.
U4N
At the same time, many players chasing optimization routes also explore trading or farming paths around cheapest place to buy arc raiders blueprints, since blueprint access directly affects whether Rocketeer-derived materials can be turned into usable upgrades or just sit in storage.
The Hornet Driver vs Rocketeer interaction is less about brute force and more about timing control. Once mastered, it turns one of the most intimidating enemies in ARC Raiders into a predictable resource loop instead of a threat.
The skill ceiling is surprisingly low, but the consistency ceiling is high—meaning small timing improvements dramatically increase success rates. Players who refine their throw angle and spacing often report going from “occasional kills” to near-repeatable farming runs with minimal variance.
We are a close community to help to meet and greet new people.
We are a secure community with 5000+ active members who help you with your queries, post new updates and grow your network.

Share this page with your family and friends.